Perforating metal starts and ends with the most crucial part – the tooling that "punches" the metal (or other substrates) to achieve a specific pattern. As a tool punches repeatedly, it presses through the metal at high speeds of up to 500 strokes per minute with immense power of up to 500 tons. Keeping the tooling in working order is incredibly important for the machine's efficiency. Because of such force and frequency, the tool must have proper lubrication to remain strong from the start to the end of a run.
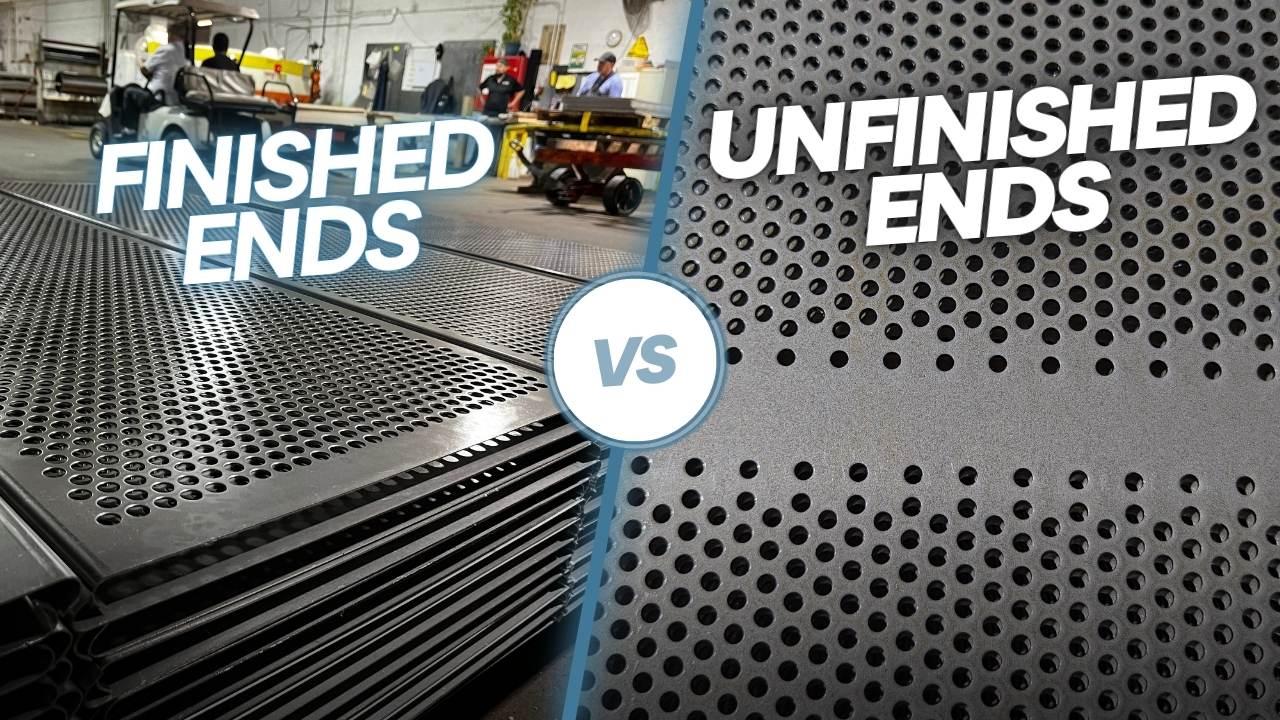
The Whys and How's of Finished and Unfinished End Patterns
The process must come together perfectly as you run a sheet or coil through a perforating press. Otherwise, the tooling will overheat, and your material could be subject to deformity. This is why most perforated metal is run with an "Unfinished end pattern." To better control heat during the perforating process. As a sheet or coil is run through a press, it's crucial that the tooling lines up perfectly with each stroke. Otherwise, your eyes will instantly be drawn to the break in the pattern, not being uniform. The tooling and press can work together by incorporating finished end patterns by gagging the finished ends, even if the tooling design is built for an unfinished end. Good tooling alignment keeps everything consistent, resulting in the tool lasting longer and minimizing any distortion to the metal that comes with the natural manufacturing process of perforating metal.
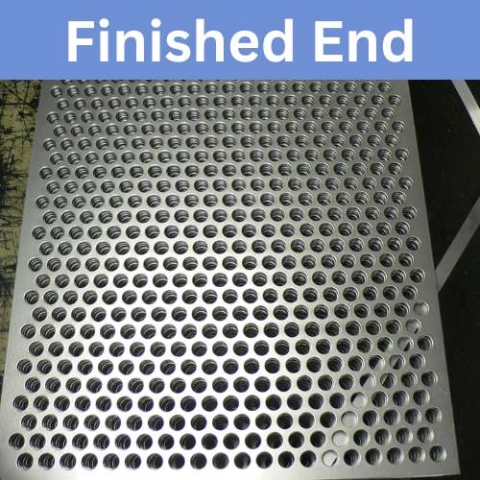
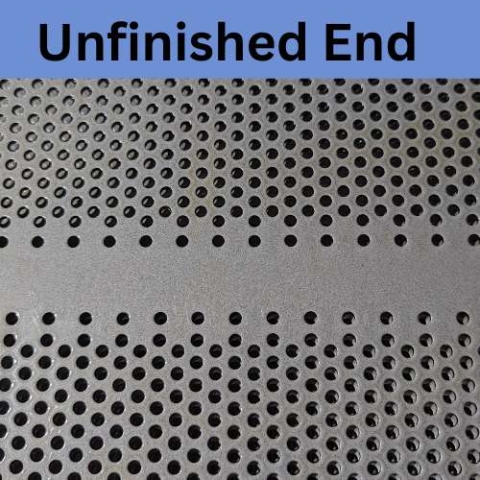
Unfinished End Patterns get their name because they look like they're missing rows of holes at the end of the perforation. It's straightforward to tell the difference between a finished and an unfinished pattern. An unfinished end will have a consistent pattern throughout the sheet, except the end and the beginning of the perforation. The finished end will have a consistent pattern all the way to the end of the perforation and the beginning of another perforation.
When Would You Need A Finished End Pattern?
From a technical perspective, there is no reason to need a finished end pattern. The perforated metal is often run to standard sizes, such as 48" wide by 96" long. These sheets or plates are then divided into smaller sections based on a customer's needs. However, the finished end pattern is necessary for aesthetic reasons if you use the entire sheet as it comes off the line. We typically see this in the architectural world when the designer looks for a specific aesthetic for their façade. Can Every Pattern Be Finished or Unfinished? I wish the answer could be yes, but it depends on the geometry of the requested pattern, tool design, and press capability. So much depends on the open area and hole sizes vs material thickness.
Can Every Pattern Be Finished or Unfinished?
I wish the answer could be yes or that we had a hard and fast rule of when a pattern was finished or unfinished. But the reality is it "just depends." Specific patterns and metal types work well as finished ends; some don't. So much of it depends on the geometry of the request pattern, tool design, and press capability. Add to that the open area and hole sizes, and it all helps determine what will work and what won't; still, when manufacturing and trying to even out the metal distortion from the sheer force of the punches from the press, we properly stay within the tooling parameters as seen fit.
Why do we make tools with unfinished ends?
One of the reasons we make tooling with unfinished ends is the hole pattern - precisely when there is a high open area with the pattern. In this instance, it's impossible to design standard tooling because the holes are too close, and the punch heads will overlap. Another reason is the tool's strength; if the rows of holes are too tight, there is a high risk that the tooling will crack during the punching process. Finally, we make unfinished tooling to minimize stress on the material during the perforating process. More spread-out layouts generate less heat, allowing a perforator to make flatter parts at the press. The flatter the component is initially manufactured, the more straightforward it is when the sheet moves into the leveling process.
What are my options if I need a finished end that doesn't work in my desired pattern?
The first step is to start with a quote or call us. Our estimating team is the best in the business and has over 100 years of experience estimating perforated metal jobs between them. As we've mentioned previously, most of our tooling is designed with an unfinished end. But what if the only pattern the customer can use is a finished pattern? Sometimes, we can do a process "gag the ends." What does "gag the ends" mean exactly? We can independently use one row of punches to punch at a time. Most tooling used in the perforation process has two rows of punches attached. To have a finished end pattern, one row needs to be held so it doesn't pierce the material. Blocking the row allows the perforator to create a finished end pattern for the customer's specification.
Please note that this option is only available on a perforated press with a gagging system, which your estimator will inform you of during the quoting process. Remember that when you gag a perforated press, the production process of the desired perforated pattern slows down, increasing costs and lead times.

What are the various components that make up a toolset for a metal perforator?

Our standard tooling has four components:
Punch Holder, Stripper, Die, Die Block, and Die Shoe.
- Punch Holder: Just as it sounds, the punch holder holds the punches in place. The punches, typically made of either Cobalt or M2, are designed to withstand the high-speed punches that the perforating press requires.
- Stripper: The stripper acts as a guide for the punches and may hold the strip flat while the material is being perforated. In addition, the stripper pulls material from the ends of the punches during the withdrawal phase so that the material is continuously pulled and punched according to the pattern. The stripper also absorbs the shock of the punch at snap-thru and withdrawal, ensuring that the tooling used is not damaged and prevents material distortion.
- Die: A Die is another crucial piece of the perforating process. This section holds the pattern that will be punched into the material as it is fed through the process. Most dies have two or four rows, depending on the pattern type and open area. As a quick rule of thumb, more expansive open areas typically have two-row dies, and narrower open areas typically have four-row dies. Because fewer punches happen simultaneously, two-row patterns take longer to finish perforating than four-row dies.
- Die Block: Since the die itself is small and narrow, it is critical to the manufacturing process to stay on a secure platform so that it doesn't move when the force of the press strikes down. That's where the die block comes into play. The die is attached to the block to give it a stable base that offers a perfect punch every time.
- Die Shoe: The Die Shoe is integral to any perforating press. The shoe is a block of tool steel that acts as a constant base to which the die block can be attached. The shoe remains flat and level for added stability as the force of each punch goes through the die and into the material.
Do You Have More Questions About End Patterns?
We love discussing perforated and fabricated metal – especially finished and unfinished end patterns. If you still have questions (and you should), the best way to answer them is to contact our sales and estimating team for a quote. We look forward to working with you on your next perforated metal project!
Blog Categories
Recent Posts
Archive
- February 2012 (2)
- April 2012 (1)
- May 2012 (3)
- June 2012 (2)
- July 2012 (2)
- August 2012 (3)
- October 2012 (2)
- November 2012 (2)
- December 2012 (1)
- February 2014 (1)